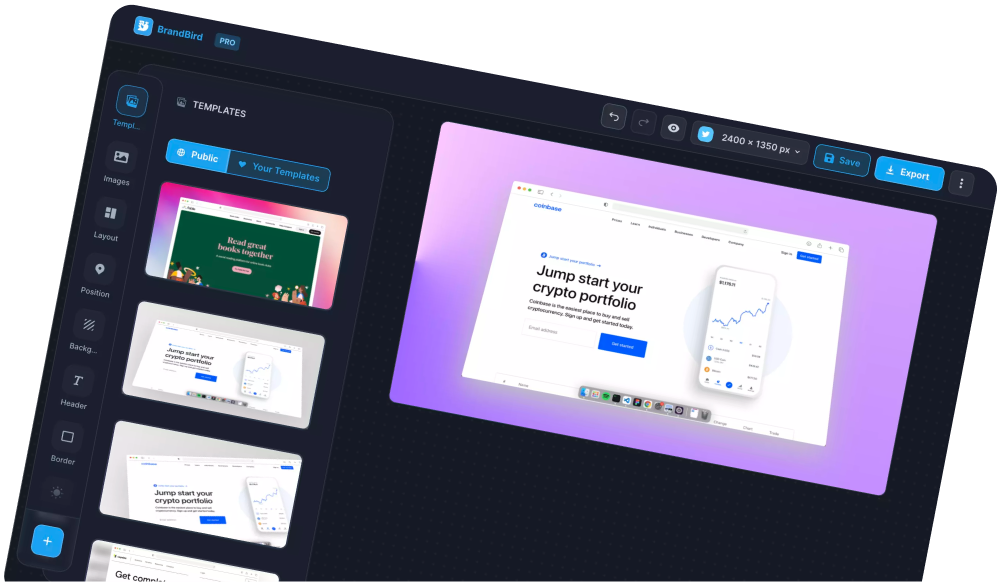
The BrandBird Chrome extension lets you quickly take screenshots of your tab and import them into the BrandBird canvas.
A useful tip to make your workflow even more powerful is to prefill a template with the screenshot.
The Smart Template Fill feature allows you to pick one of your BrandBird templates and fill it with an image or a text layer via the Chrome Extension.
Let's dive in to learn how.
Pick a template
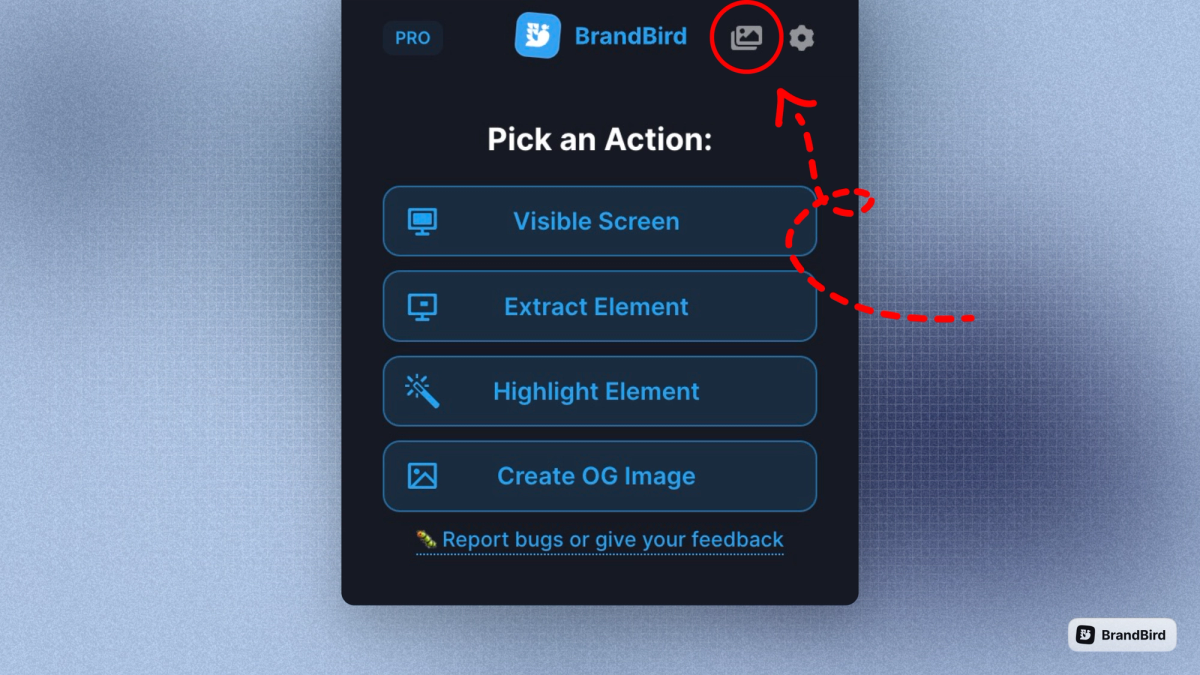
1. Run the extension.
2. Click the image icon at the top right header of the BrandBird extension popup.
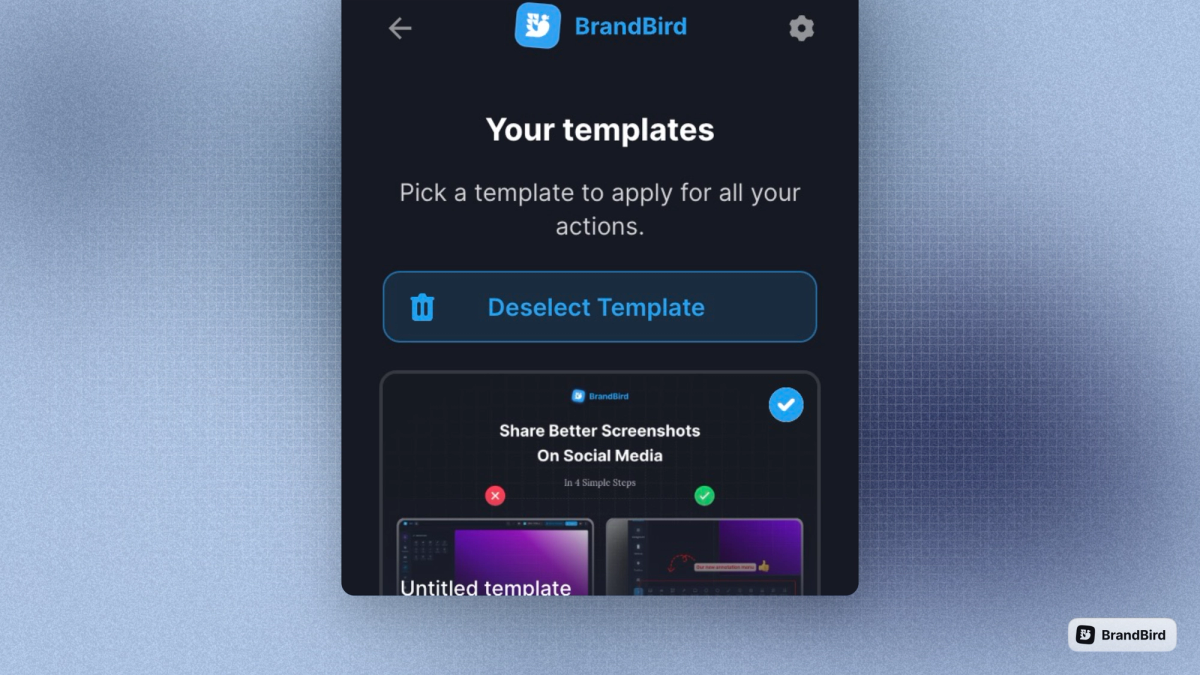
3. Pick the template you want to populate (or remove the active one).
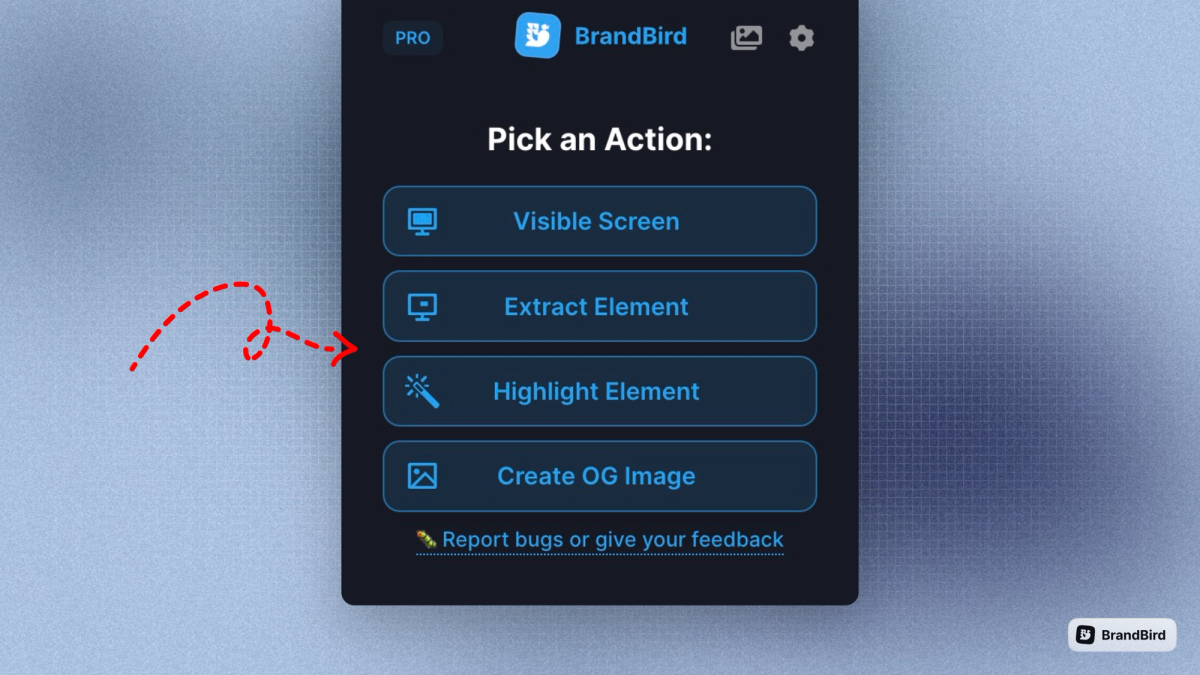
Take a screenshot
Use any of the available options to take a screenshot or import an image to BrandBird:
1. Screenshot the entire active tab
2. Select a specific element
3. Highlight an element (automatically zooms into the element and adds a black overlay to the rest of the UI)
4. Import any images with "Right click > Import image to BrandBird"
Smart Template Fill
The plugin automatically imports the image to BrandBird and populates the active template by following these rules.
- It replaces the first of your images (if you have any images)
- It replaces the first annotation image layer (if you have a layer)
- Adds a new image annotation layer if your template doesn't include an image or an image annotation layer.
When you import text with the "Right click > Import text to BrandBird" option, it always creates a new text annotation layer.
It doesn't replace any of your template's text layers.
The Most Powerful Image Editor
for SaaS Founders
Get Started Now